If you are writing a nonfiction book, you may have a section in the back referencing source material, such as other books or magazine articles. These references should be formatted with hanging indents. That is, the first line is flush left, and the following lines are indented as shown below.

At Jera Publishing, we often receive manuscripts for formatting with reference sections created by authors who did not know how to format a hanging indent, but they gave it their best try. Paragraph breaks, tabs, and spaces were used to try to make a hanging indent effect but causing a mess in the process. Below is an example that shows the formatting markup of a forced hanging indent.
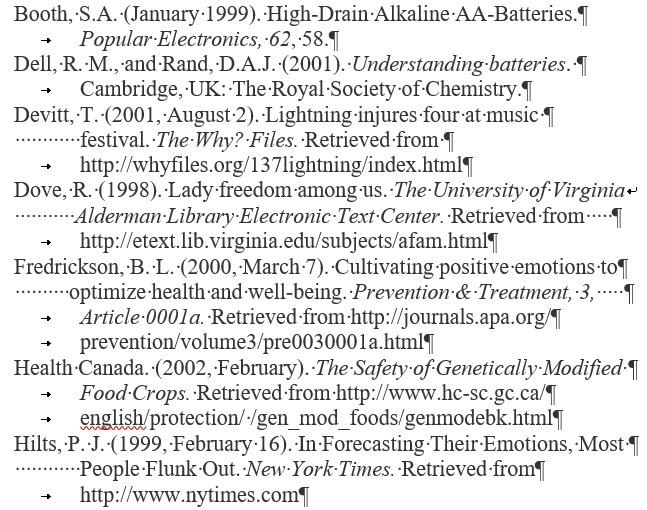
Before we can properly format references created this way, we need to go in and clean up this mess. Unfortunately, while the author had good intentions, they wasted their time and ours by trying to make it look right before sending it to us.
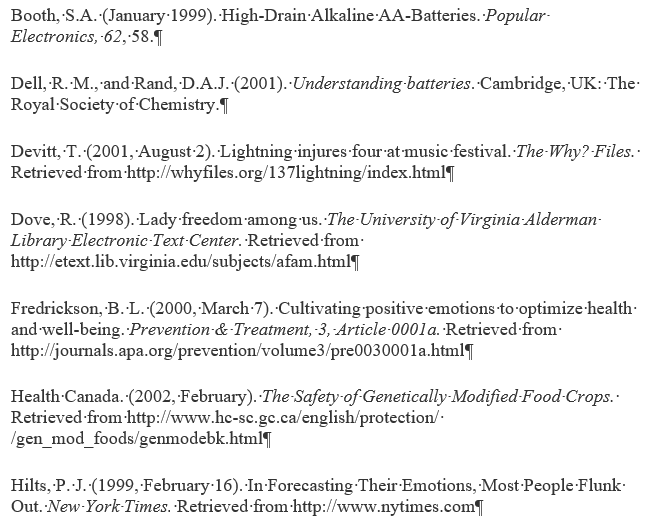
If you are hiring someone to do your book formatting, it is better to leave the references formatted as normal paragraphs (as shown below) and allow your book designer to style them for you.
Of course, if you plan on doing your book layout yourself, you need to learn how to do this correctly. Trying to force it like in the first example is a pain and will cause issues if you ever change your book size, the font size, fonts, etc. There is a better way to create a hanging indent in Microsoft Word!
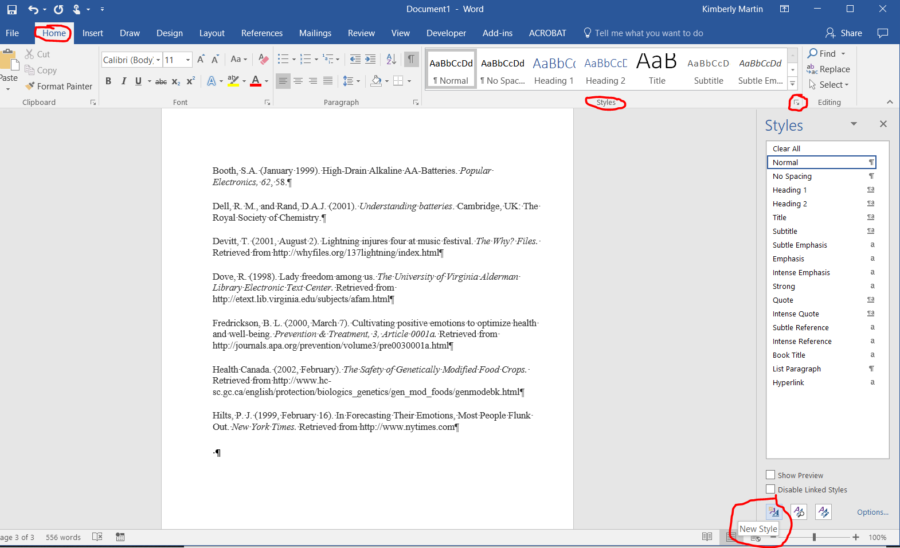
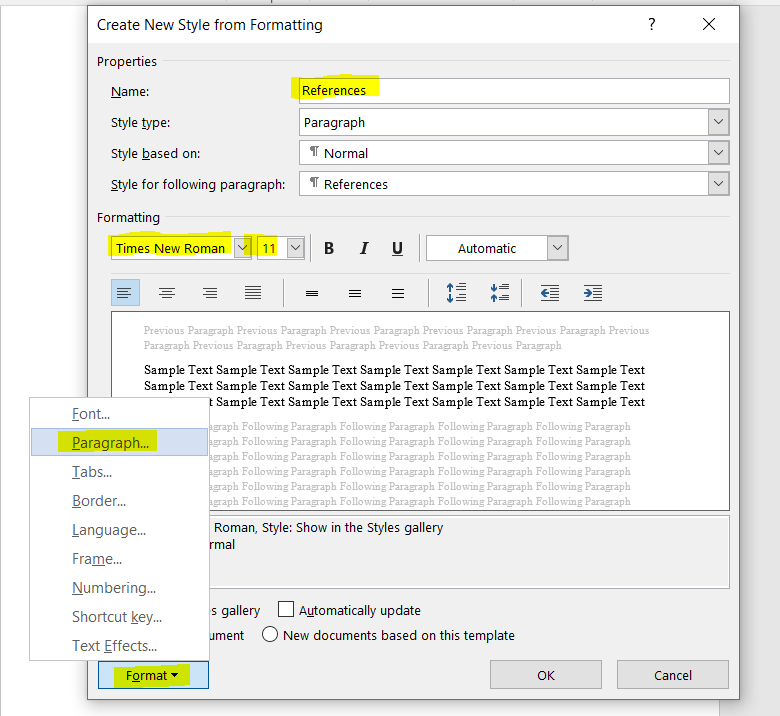
The first step is to create a style in Word that you will use for your reference text. From the Home tab, open your Style menu and click on the New Style icon.
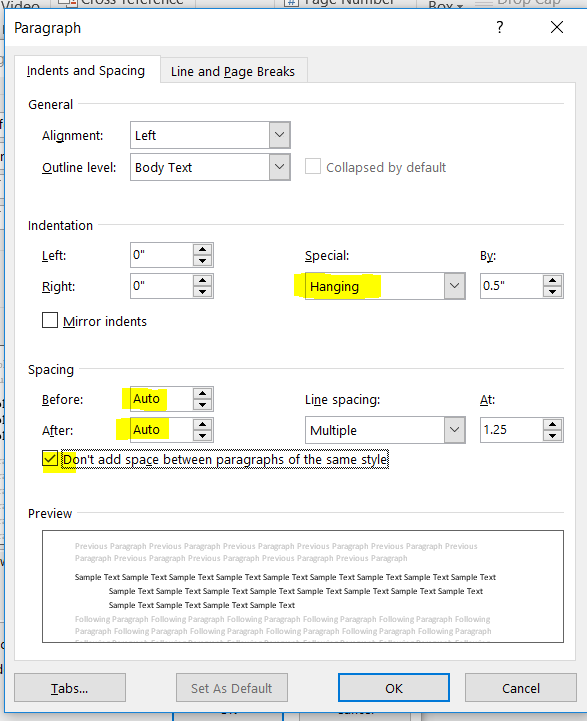
Name your style something you will remember, such as References. Set the font and font size as desired (typically, the same as your chapter text). Then click on the Format button at the bottom and select Paragraph.
Under Special, choose Hanging. Next, set the spacing before and after to Auto and check the Don’t add space between paragraphs of the same style option. Click OK to close that window, then OK again in the other window. Your style is now created.
To apply your newly created style to your references, click your mouse within one of the references you wish to format, then click on the Reference style name. This can be found in either the side Style menu or the Quick Styles at the top. This will format your reference text the way it should look. Continue clicking and applying the style to your references. It will look like the following when done.
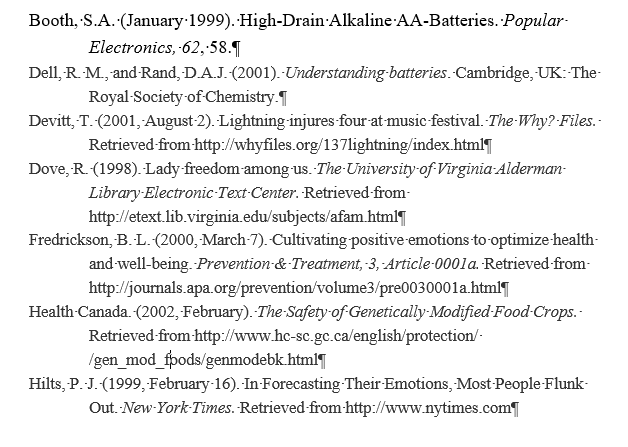
I left Show Formatting turned on for the screenshot so you can see the paragraph breaks in the formatting and compare it to the chaos from the first example. Doesn’t this look much better? It will also won’t cause any issues as the first example would when working with the layout if you make edits or changes to the overall style of your layout.
Thanks so much for this. As a writer and a high school English teacher, this nifty trick will prove helpful. Greatly appreciated.
Hello, Kimberly! This is my first time here. I’ll follow your blog and connect with you online.
Thanks for sharing this how-to with the diagrams. I’ve learned lots and shared the post online. http://victoriamarielees.blogspot.com
I know how to do this, but I know a lot of people don’t – thanks for the useful step-by-step instructions I can point people towards.
Two other things I often see in manuscripts I edit are using the Enter key multiple times to start a chapter on a new page (use Ctrl-Enter instead, to force a new page), and using multiple spaces at the start of a new paragraph instead of setting the Style with a 1/2 inch indent.
You may be interested in my other post that covers those items: Common Mistakes Made When Writing a Book in Microsoft Word.
Yes please. I love formatting tips. Am I the only one? I gobble them up.
Thanks for the detailed screenshots. It’s crazy how much there is to know to get a book out right.
Thanks for the lesson. Formatting is not easy for me. 🙂
Anna from elements of emaginette
Yet another reason to hire a professional. 🙂 Thanks for sharing the tip
Using Styles is critical in formatting. I don’t know if I’ll use a hanging indent, but I appreciate the lesson.
Styles are a life-saver. I wish they taught high schoolers how to properly use Word, including styles!